Hip Thrust Setup: Why the Bench Height Changes Everything
Quick Answer: The bench edge should hit the bottom of your shoulder blades - the bra-band line - which for many women means a standard 16 to 18 inch bench is too tall. Too-high a bench turns the movement into a back-arch contest: ribs flare, the lumbar spine hyperextends, and the glutes hand the work upstream. Fix the height (aerobic step with risers is the cheat code), plant feet so shins are vertical at the top, tuck the chin, and finish with a squeeze instead of an arch.
The hip thrust is supposed to be the most glute-dominant lift in the gym. When it leaves your lower back lit up and your glutes bored, the exercise is not broken - the setup is, and nine times out of ten the villain is a bench built for bench pressing, not thrusting.

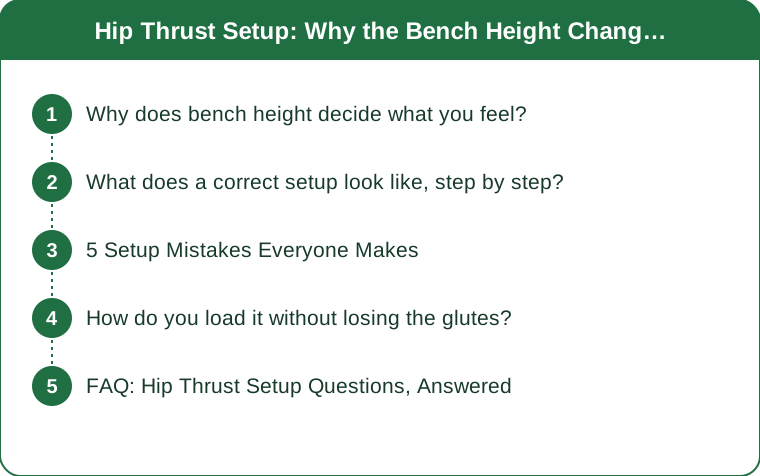
Why does bench height decide what you feel?
Because the bench sets the pivot point, and the pivot point decides which joint does the moving.
The movement is meant to hinge at the hips. Upper back rests on the pad, hips drop and drive, and the torso tilts around the bench edge like a seesaw. When the edge sits at the lower tips of the shoulder blades, the pivot happens at mid-back and the hips travel through a full, clean arc.
A too-tall bench moves the pivot up and the compensation down. With the pad edge near your shoulders, reaching full hip extension at the top requires more torso tilt than the geometry allows - so the body improvises the missing range from the lumbar spine. Ribs flare, the low back arches hard, and the finish position becomes a hyperextension instead of a hip lockout. That arch is exactly where the back takes over the work, and it is why the day-after soreness lands above the waistband instead of below it.
A too-low bench wastes range in the other direction. Shoulders scraping near the floor shortens the arc and turns the lift into a glute bridge - not wrong, just less.
The height that works is personal, because torso length varies. Two women using the same 17 inch bench can have completely different experiences: the long-torsoed one is fine, the shorter-torsoed one is functionally thrusting off a wall. The bra-band rule adjusts for this automatically - wherever the bench edge meets the bottom of your shoulder blades, that is your height.
The practical fixes, in order: an aerobic step with stackable risers (adjustable in inch-ish increments - the single best hip thrust station most gyms own), a dedicated thrust bench or wedge if the gym has one, or a bar-in-rack setup with the pad height set exactly where you want it. Adjusting the equipment beats adapting your spine every time.
What does a correct setup look like, step by step?
Ninety seconds of setup buys an entire session of glute work.
1. Anchor the bench. Against a wall, a rack upright, or heavy dumbbells behind the legs - the bench must not slide backward under drive. A moving bench quietly steals force from every rep and loudly ends one eventually.
2. Sit tall against the pad, edge at the bra band. Bottom of the shoulder blades on the edge. If the edge is at your shoulders, lower the surface; at your mid-back ribs, raise it.
3. Roll the bar over and pad it. A thick bar pad or folded mat is non-negotiable - a knurled bar across the hip bones is a genuine misery, and thin-waistband bottoms make it worse. This is the one lift where high-waisted leggings with a substantial band earn their keep as equipment: a wide waistband plus a thick pad turns pain-limited sets into muscle-limited ones.
4. Feet: hip-to-shoulder width, walked in until shins are vertical at the top. The calibration rep is the test - drive up and look: knees stacked over ankles means correct; knees past toes means walk the feet out; shins angled away means walk them in.
5. Chin down, ribs down, eyes forward. Pick a spot on the wall ahead and keep it through the rep. Gazing at the ceiling invites the arch; a gentle chin tuck and a proud-but-not-flared chest keep the pelvis honest.
6. Drive through mid-foot and heels, finish with the squeeze. Top position is a straight line from knees through hips to shoulders - torso parallel-ish to the floor, glutes clenched hard for a one-count. Height above that line is arch, not extension.
7. Lower with control to a soft touch and go again. Collapsing to the floor between reps resets the tension you spent the setup building.

5 Setup Mistakes Everyone Makes
1. Using whatever bench is nearest. The flat utility bench was designed for pressing, and its 17 inches suit a fraction of the people thrusting off it. The tell is immediate: if your first rep produces a rib flare and a low-back pinch at the top, stop adjusting your spine and go find the aerobic step and risers.
2. Feet too far out or too close in. Too far turns the top position into a hamstring event and can bring cramping with it; too close makes it knee-dominant and quaddy. Vertical shins at lockout is the answer to both, and it takes one calibration rep to check.
3. Pushing through the toes. Weight drifting to the forefoot shifts drive toward quads and calves and unseats the heels at heavy loads. Big toe stays down, but the force goes through mid-foot and heel - some lifters curl toes up inside their shoes for a set to recalibrate.
4. Chasing height at the top. More lift feels like more work, but everything above the straight knee-hip-shoulder line comes from the lumbar spine. Judges of form watch the line and the squeeze, not the altitude. Film one set from the side; the video ends the debate in five seconds.
5. Skipping the pad because the weight is light. The hip bones bruise at loads the glutes consider a warm-up, and flinching from bar contact rewires the movement worse than any technical fault. Pad from the first rep, wear bottoms with real waistband coverage - squat-proof leggings with a wide band beat thin shorts here for pure comfort - and the nervous system stays out of the conversation.
Bonus: no bench anchor. The classic silent saboteur. If you have ever finished a set two feet from where you started, every rep of it leaked force into sliding furniture.
How do you load it without losing the glutes?
Progression is where good setups go to die - unless the rules travel with the weight.
Earn the lockout before adding plates. The qualification standard: a full pause at the top with a hard one-to-two-second squeeze, ribs down, on every rep of every set. When the pause disappears and reps become bouncy, the load has outrun the movement - the glutes are no longer finishing, momentum is.
Progress tempo and pause before weight, early on. A three-second lowering phase, a two-second squeeze, or a one-and-a-half-rep scheme adds brutal glute work with zero added spinal or setup demand. Lifters who spend a month owning slow reps at moderate weight almost always pass the heavier loads later with form intact.
Add weight in small jumps and re-run the checklist each time. Every meaningful load increase deserves one setup audit - bench anchored, edge at the bra band, shins vertical, chin down. Heavy weeks are when the arch creeps back in, one vertebra at a time.
Use the single-leg and B-stance variations as honesty tests. A B-stance thrust (one foot planted, the other heel kissing the floor as a kickstand) at a fraction of the bilateral load exposes side-to-side differences and reinforces the hip-hinge pattern. If one side arches and shakes, the two-leg version was hiding it.
Program it once or twice a week and let it be enough. Hip thrusts respond to consistent progressive load, not daily volume - a heavy day and a tempo day cover the bases beautifully alongside squats, hinges, and step-ups.
And judge progress by the right scoreboard. More weight with the same clean line, the same pause, and the work landing squarely in the glutes - that is progress. More weight with a taller arch is just a more impressive way to train your lower back.
FAQ: Hip Thrust Setup Questions, Answered
What height should the hip thrust bench be?
Whatever height puts the bench edge at the bottom of your shoulder blades when seated against it - the bra-band line. For many women that is 14 to 16 inches, below the standard 16 to 18 inch utility bench. An aerobic step with risers is the easiest way to dial it in; adjust the equipment to your torso, never the reverse.
Why does my lower back hurt during hip thrusts?
Almost always because the finish position is an arch instead of a lockout - usually caused by a too-tall bench, a ceiling-ward gaze, or chasing extra height at the top. Set the edge at the bra band, tuck the chin, keep ribs down, and stop the rep at the straight knee-hip-shoulder line with a hard squeeze.
Where should my feet be?
Walked in until your shins are vertical at the top of the rep - knees stacked directly over ankles. Check with one calibration rep and adjust. Feeling it in hamstrings means feet are too far out; feeling it in quads means too close.
Do I need a barbell for this to work?
No - single-leg and B-stance thrusts with body weight or a dumbbell, banded thrusts, and slow-tempo variations build serious glute strength, especially early on. The barbell is the loading tool for later; the hinge pattern, full lockout, and squeeze are the exercise from day one.
TL;DR:
- Bench edge at the bra-band line - standard benches are too tall for many women; steps with risers fix it.
- Too-high bench equals rib flare and lumbar arch: the back takes what the glutes were owed.
- Shins vertical at the top, chin tucked, drive through heels, finish at the straight line with a squeeze.
- Pad the bar and wear a real waistband - comfort is load-bearing on this lift.
- Progress pause and tempo before plates, and film a side-view set when in doubt.
The hip thrust never needed to be complicated. It needed four inches off the bench and a chin tuck - the glutes handle everything after that.
See It in Motion
Seen here: High Waist Yoga Leggings with Side Pockets — shop it on bubblelime.com
Keep Reading
This article is for general informational and styling purposes only. Fit, sizing, and product availability may vary.